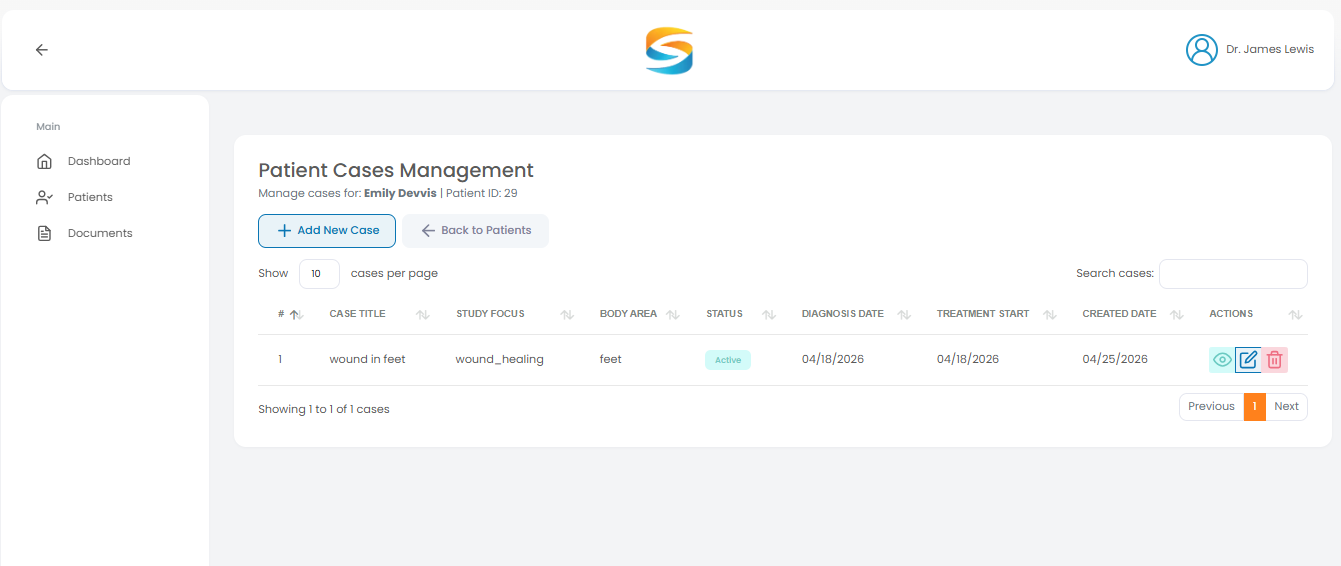
Overview: After creating a case, click View Case. The system guides you through 9 sections in order. Each section must be completed before the next becomes available.
Case Workflow Tabs (All 9 Tabs)
The following tabs appear at the top of the case page:
| Tab | Section |
|---|
| 1 | Consent |
| 2 | Baseline |
| 3 | Diagnosis & Condition |
| 4 | Treatment Details |
| 5 | Imaging Information |
| 6 | Adverse Events |
| 7 | Outcomes |
| 8 | Provider & Facility |
| 9 | Follow-Up |
Important Follow-up Logic
| Scenario | When Follow-up Creates |
|---|
| Treatment Start Date entered during case creation | Follow-up is created immediately |
| Treatment Start Date not entered during case creation | Follow-up is created when the Treatment Details page is saved |
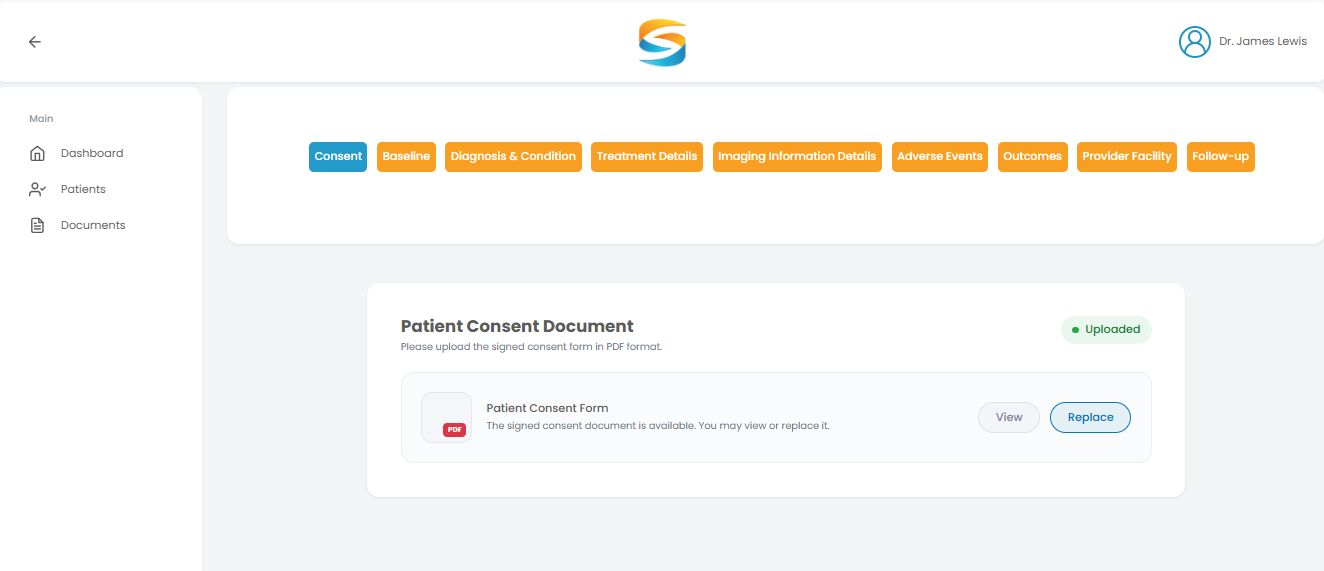
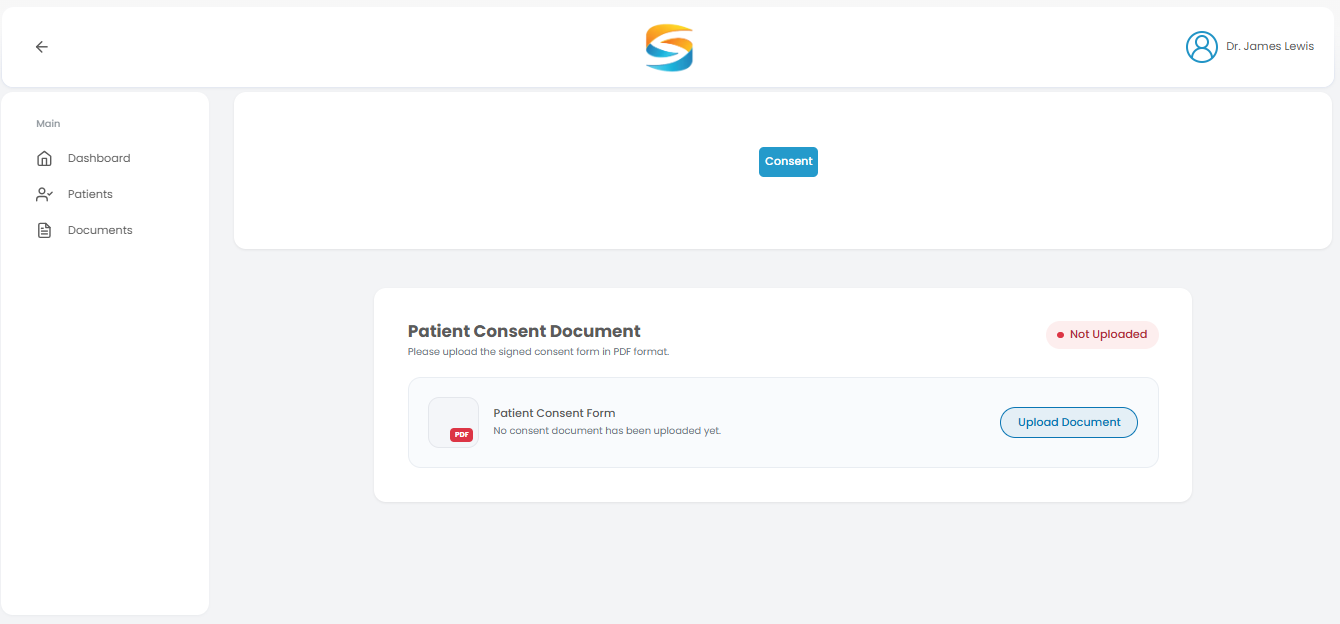
7.1 Tab 1: Patient Consent Document
Overview: Upload the patient's signed consent form. This is mandatory and must be completed before proceeding to other tabs.
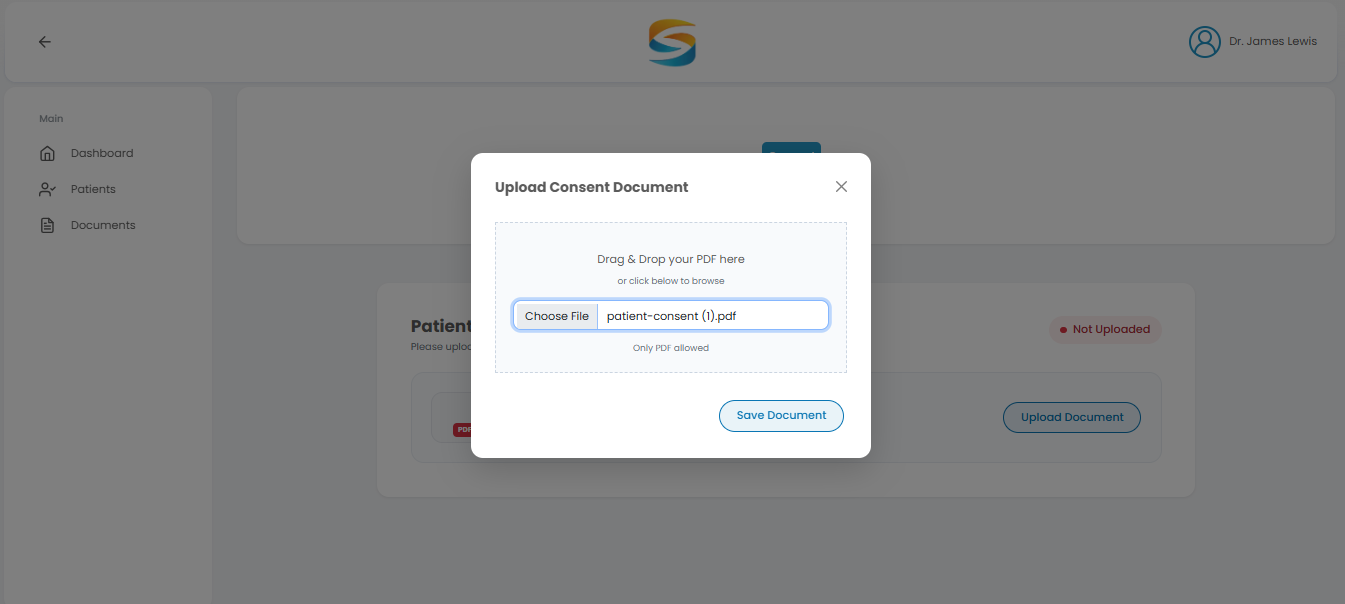
Steps:
- Click Upload or Choose File
- Select the signed consent PDF file from your computer
- Click Save
Supported file formats: PDF, DOC, DOCX, JPG, PNG
✅ After uploading, you can:
- View the document (👁️ eye icon)
- Replace the document with a new version
⚠️ Important: You cannot access other tabs until the consent document is uploaded.
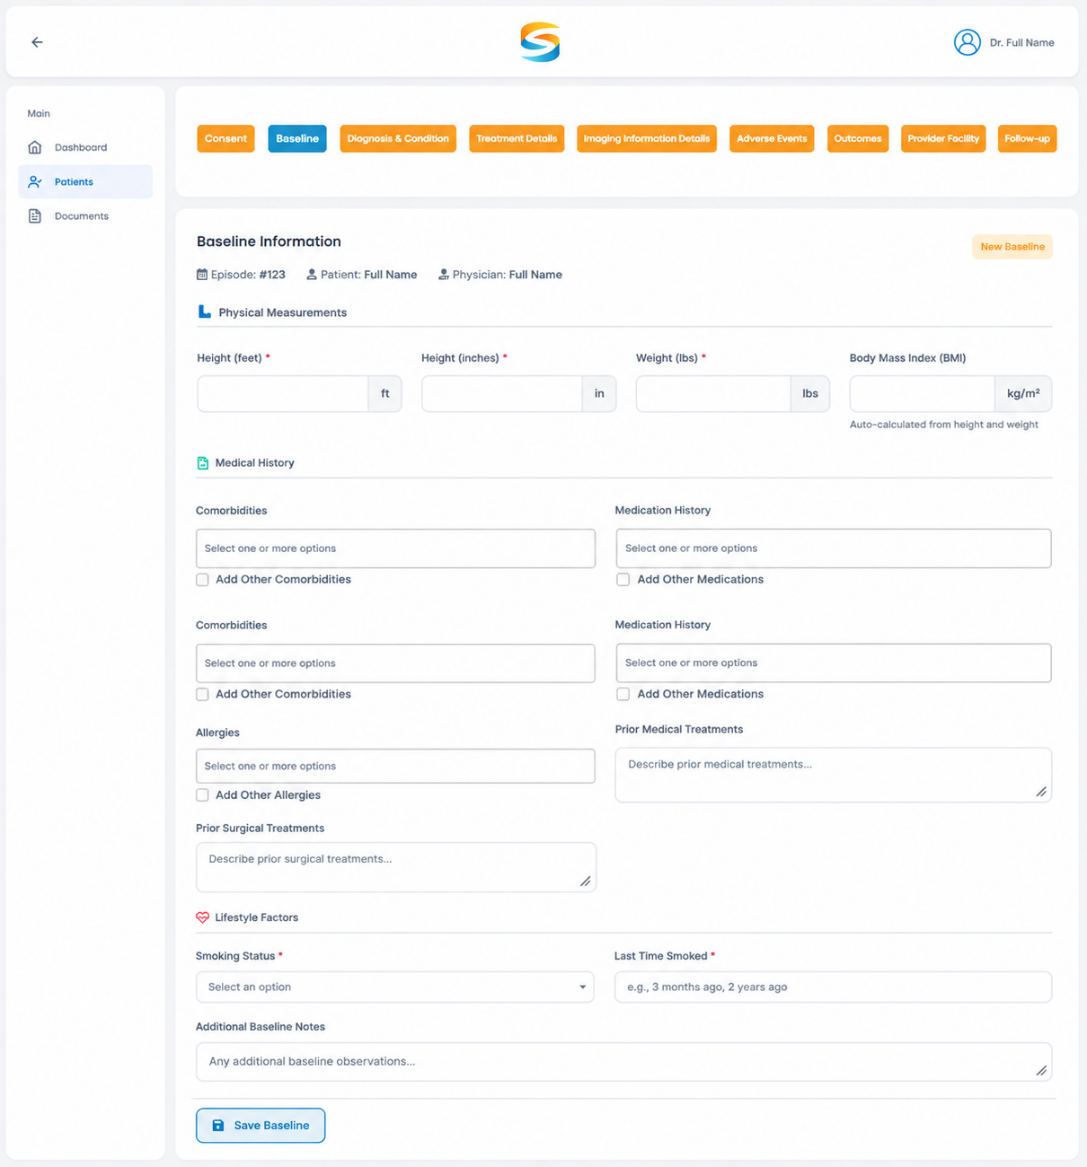
Overview: Enter the patient's baseline clinical data.
Sections and Fields:
| Section | Information Collected |
|---|
| Physical Measurements | Height (Feet/Inches), Weight (lbs.), BMI (auto-calculated) |
| Medical History | Comorbidities, Allergies, Prior Surgical Treatments, Smoking Status, Additional Notes |
| Medication History | Current Medications, Prior Medical Treatments |
Steps:
- Fill in all baseline fields
- Click Save Baseline
✅ After saving, the system stores this information and unlocks the next tab.
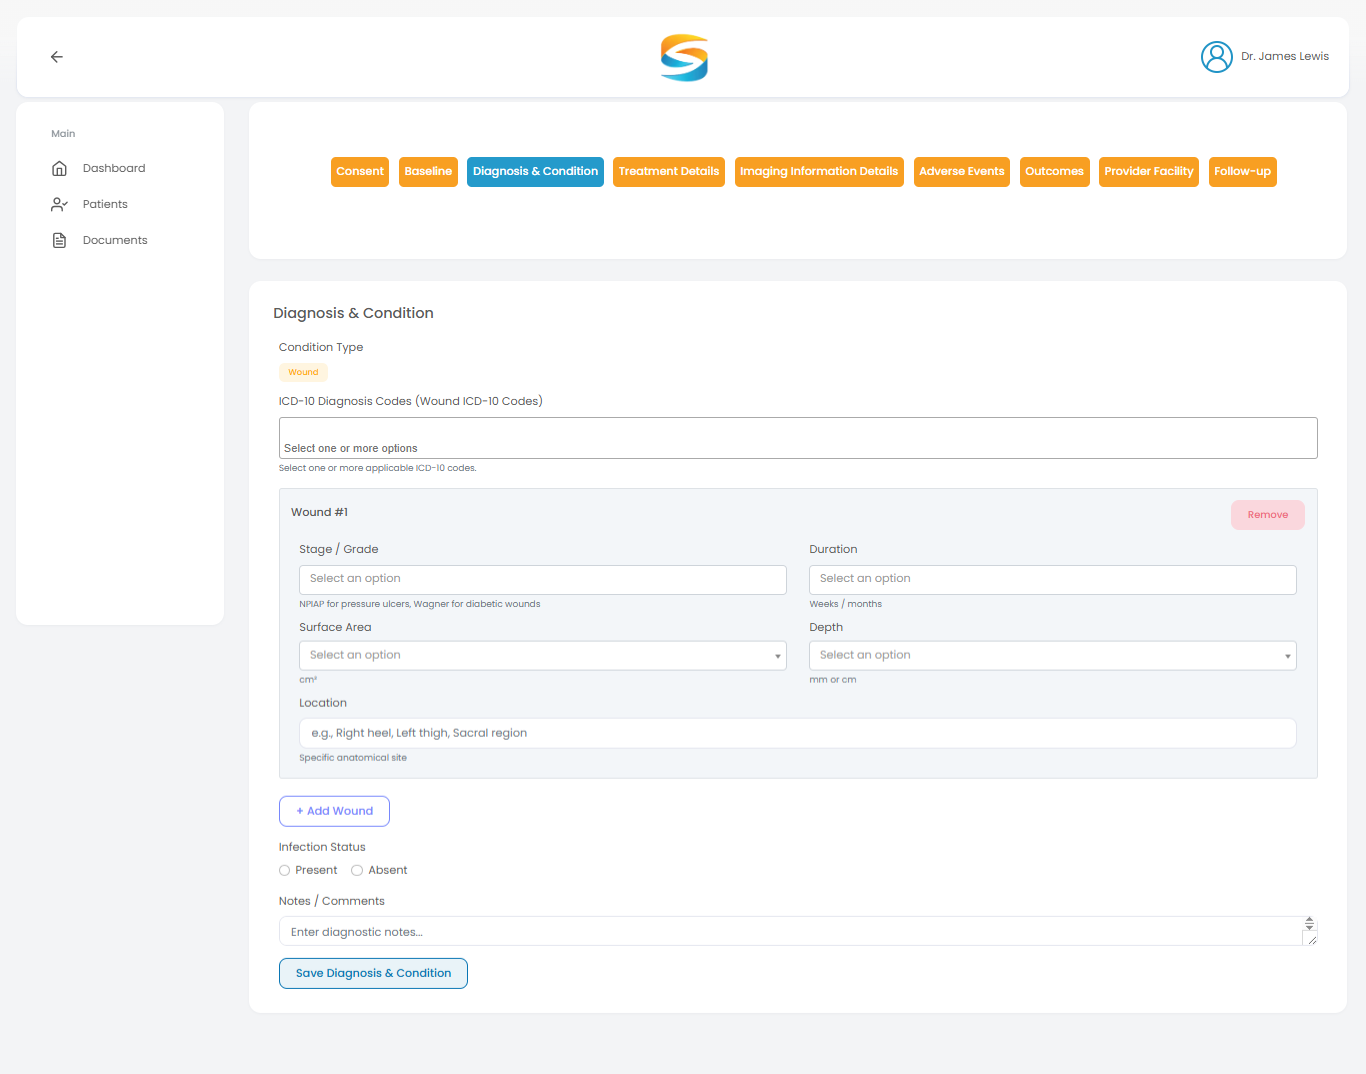
7.3 Tab 3: Diagnosis & Condition
Overview: Add diagnosis details. Available fields depend on the Study Focus (Pain / Orthopedic / Wound Healing) selected during case creation.
Fields:
| Field | Description |
|---|
| Condition Type | Primary diagnosis |
| ICD-10 Diagnosis Codes | Standard diagnosis codes |
| Infection Status | Present or Absent |
| Pain Type | Select from options (for Pain study focus) |
| Baseline Pain Score | VAS or NRS score 0-10 (for Pain study focus) |
| Notes / Comments | Additional diagnostic notes |
Steps:
- Fill in all diagnosis fields
- Click Save Diagnosis & Condition
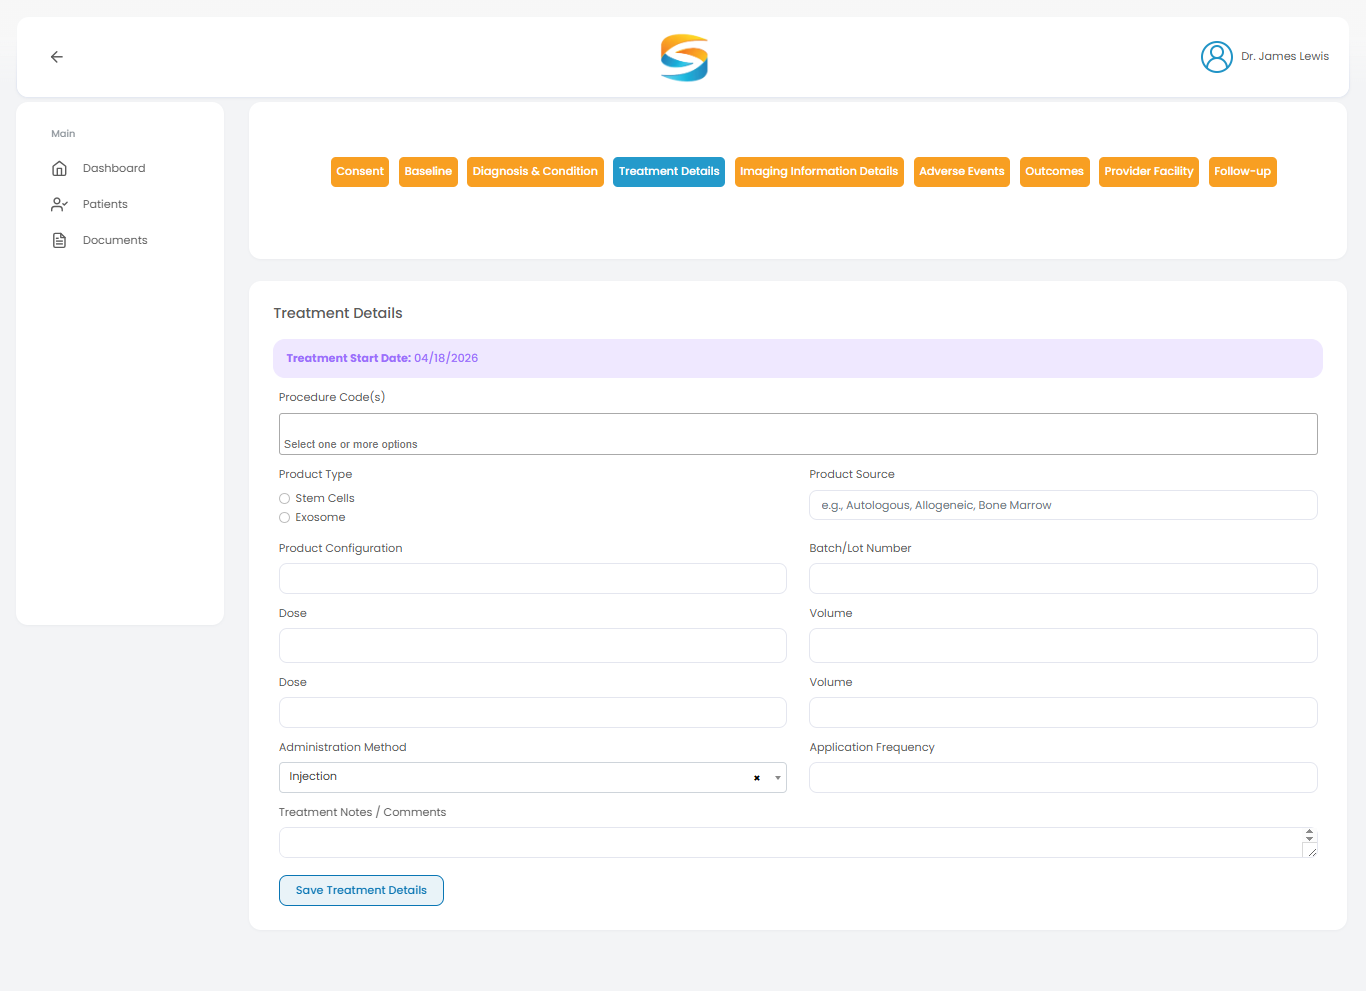
7.4 Tab 4: Treatment Details
Overview: Enter treatment information. This section triggers follow-up creation.
Fields:
| Field | Description |
|---|
| Treatment Start Date | Date treatment began (critical for follow-ups) |
| Procedure Code(s) | Medical procedure codes |
| Product Type | e.g., Stem Cells, Exosomes |
| Product Source | e.g., Autologous, Allogeneic |
| Batch/Lot Number | Product identifier |
| Dose | Amount administered |
| Volume | Volume of product |
| Administration Method | e.g., Injection, Topical |
| Application Frequency | How often is treatment applied? |
| Treatment Notes / Comments | Additional notes |
Steps:
- Fill in all treatment fields
- Click Save Treatment Details
⚠️ Critical Logic:
- If Treatment Start Date is entered → Follow-ups are created instantly
- If NOT entered → Follow-ups are created after saving this page
✅ After saving, follow-ups are created automatically.
Overview: Upload imaging files and add findings.
Sections and Fields:
| Section | Information |
|---|
| Type of Imaging | Select imaging modality (e.g., MRI, CT, X-ray, Ultrasound) |
| Timing | Baseline, Week 4, Week 8, or Week 12 |
| Upload Imaging Files | Upload imaging files (PDF, DICOM, JPG, PNG) |
| Findings | Enter text OR upload findings document |
| Standardized Scoring | Enter text OR upload scoring document |
| Additional Notes | Optional clinical comments |
Steps:
- Select Type of Imaging and Timing
- Upload imaging files (multiple files may be allowed)
- Enter findings as text OR upload a document
- Enter scoring as text OR upload a document (optional)
- Click Save Imaging Information
7.6 Tab 6: Adverse Events
Overview: Record any adverse events. The risk categories shown are based on the study's focus.
Fields:
| Field | Description |
|---|
| Adverse Event Description | Describe the event, symptoms, onset, and progression |
| Severity | Select severity level (Mild / Moderate / Severe) |
| Timing | e.g., within 24h, 7 days post-treatment |
| Causality | Relationship to treatment (e.g., Related, Unrelated, Unknown) |
| Outcomes | Describe resolution and interventions |
| Specific Risk Category | Select relevant risk categories from the dropdown |
| Additional Custom Risk | Enter any risk not listed |
Steps:
- Fill in all adverse event fields
- Click Save Adverse Events
7.7 Tab 7: Outcomes
Overview: Enter treatment outcomes. Outcome measures are based on the study focus.
Fields:
| Field | Description |
|---|
| Pain Reduction | Percentage of pain reduction (e.g., 0%, 25%, 50%, 75%, 100%) |
| Quality of Life | Patient-reported quality of life change (e.g., Much Worse to Much Better) |
| Functional Improvement | Describe improvements in function (free text) |
| Follow-Up Intervals | Select applicable intervals (4, 8, 12, 24, 52 weeks) |
Steps:
- Select Pain Reduction percentage
- Select Quality of Life change
- Enter Functional Improvement description
- Select Follow Up Intervals that apply
- Click Save Outcomes
7.8 Tab 8: Provider & Facility
Overview: Enter treatment facility and physician training information.
Sections and Fields:
| Section | Information Collected |
|---|
| Treatment Facility | Clinic, City, State, Country, ZIP, FDA information, cGMP Certification, Consent Document, Additional Notes |
| Physician Training Documentation | Upload training documents (PDF, DOCX) |
Buttons:
| Button | Action |
|---|
| Reset | Clear unsaved changes |
| Save Provider & Facility Information | Save all data |
Steps:
- Fill in all facility fields (some may be auto-filled from your clinic profile)
- Upload training documentation
- Click Save Provider & Facility Information
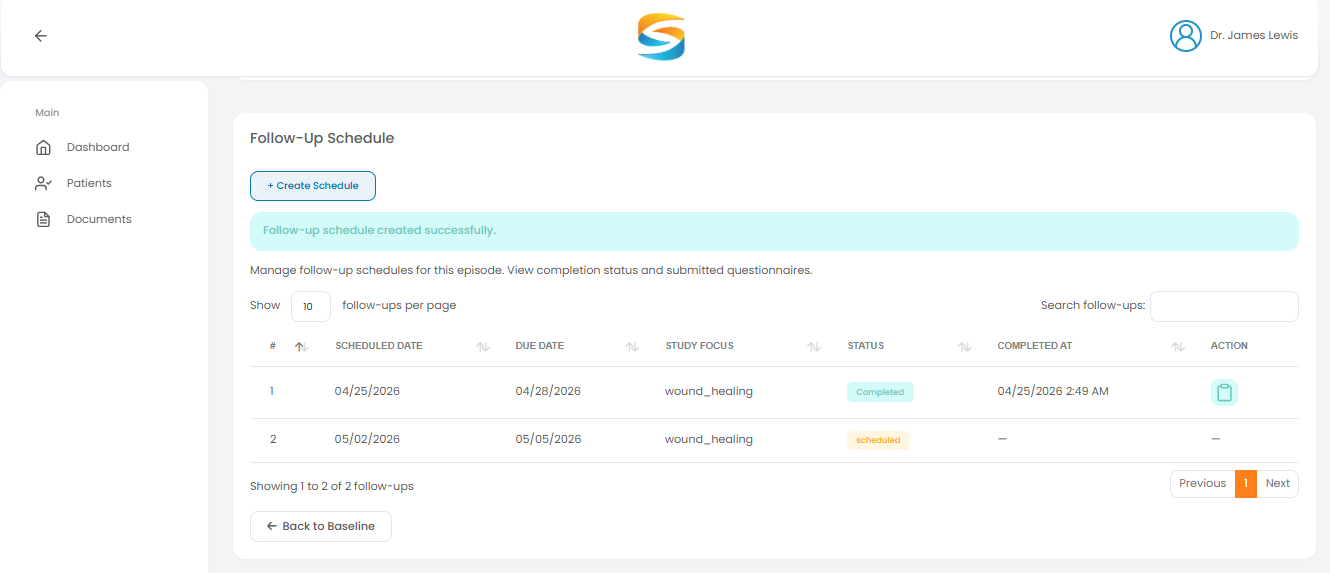
7.9 Tab 9: Follow-Up
Overview: View follow-up schedules, track patient progress, and manually create or modify follow-up dates. This tab is where you manage all follow-up activities after treatment has started.
Follow-Up Table Displays:
| Column | Description |
|---|
| # | Follow-up number |
| SCHEDULED DATE | Date follow-up was created (original or manually set) |
| DUE DATE | Scheduled Date + 3 days |
| STUDY FOCUS | Pain / Orthopedic / Wound Healing |
| STATUS | Scheduled / Completed / Late / Missed |
| COMPLETED AT | Date and time of submission (if completed) |
| ACTION | View Questionnaire button (when completed) |
Available Actions:
| Action | Description |
|---|
| Create Schedule | Manually create a new follow-up (overrides automatic schedule) |
| View Questionnaire | View patient responses (for completed follow-ups only) |
How to Manually Create a Follow-Up (Override Automatic Schedule)
Steps:
| Step | Action |
|---|
| 1 | Click the Create Schedule button |
| 2 | Enter the new Follow-Up Date |
| 3 | Add clinical notes (optional) |
| 4 | Click Save |
Manually update the follow up:
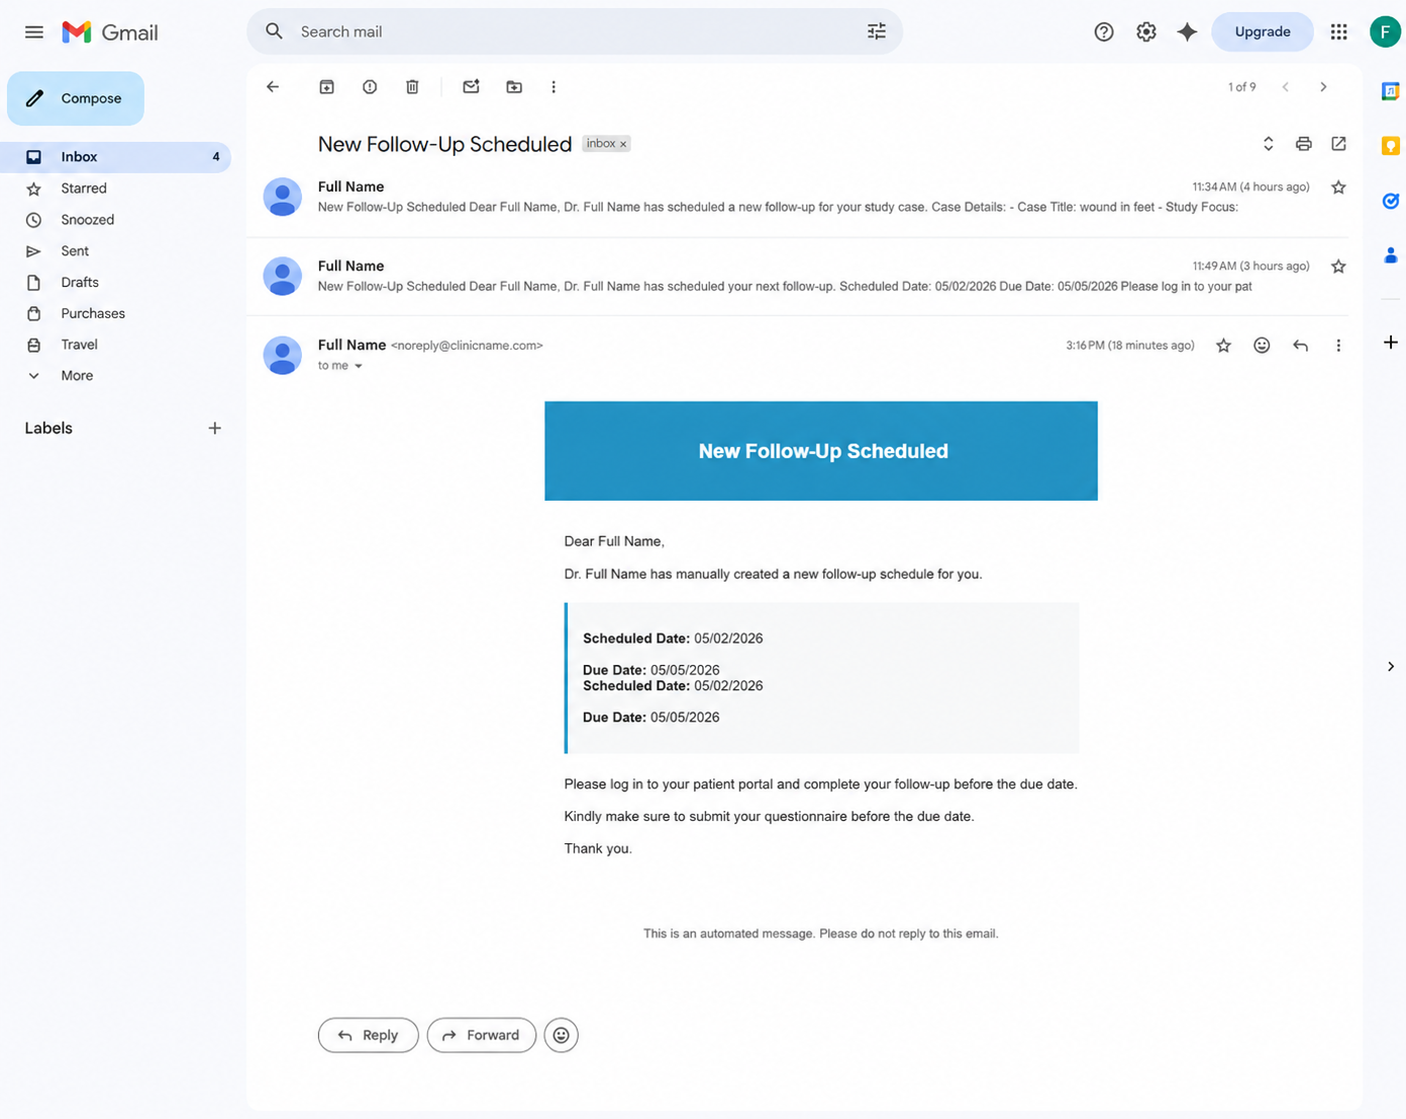
System Behavior When You Manually Create a Follow-Up:
| Step | Action |
|---|
| 1 | System checks for any existing automatic schedule. |
| 2 | The system creates your new manual follow-up with your selected date. |
| 3 | The system removes or replaces the original automatic schedule. |
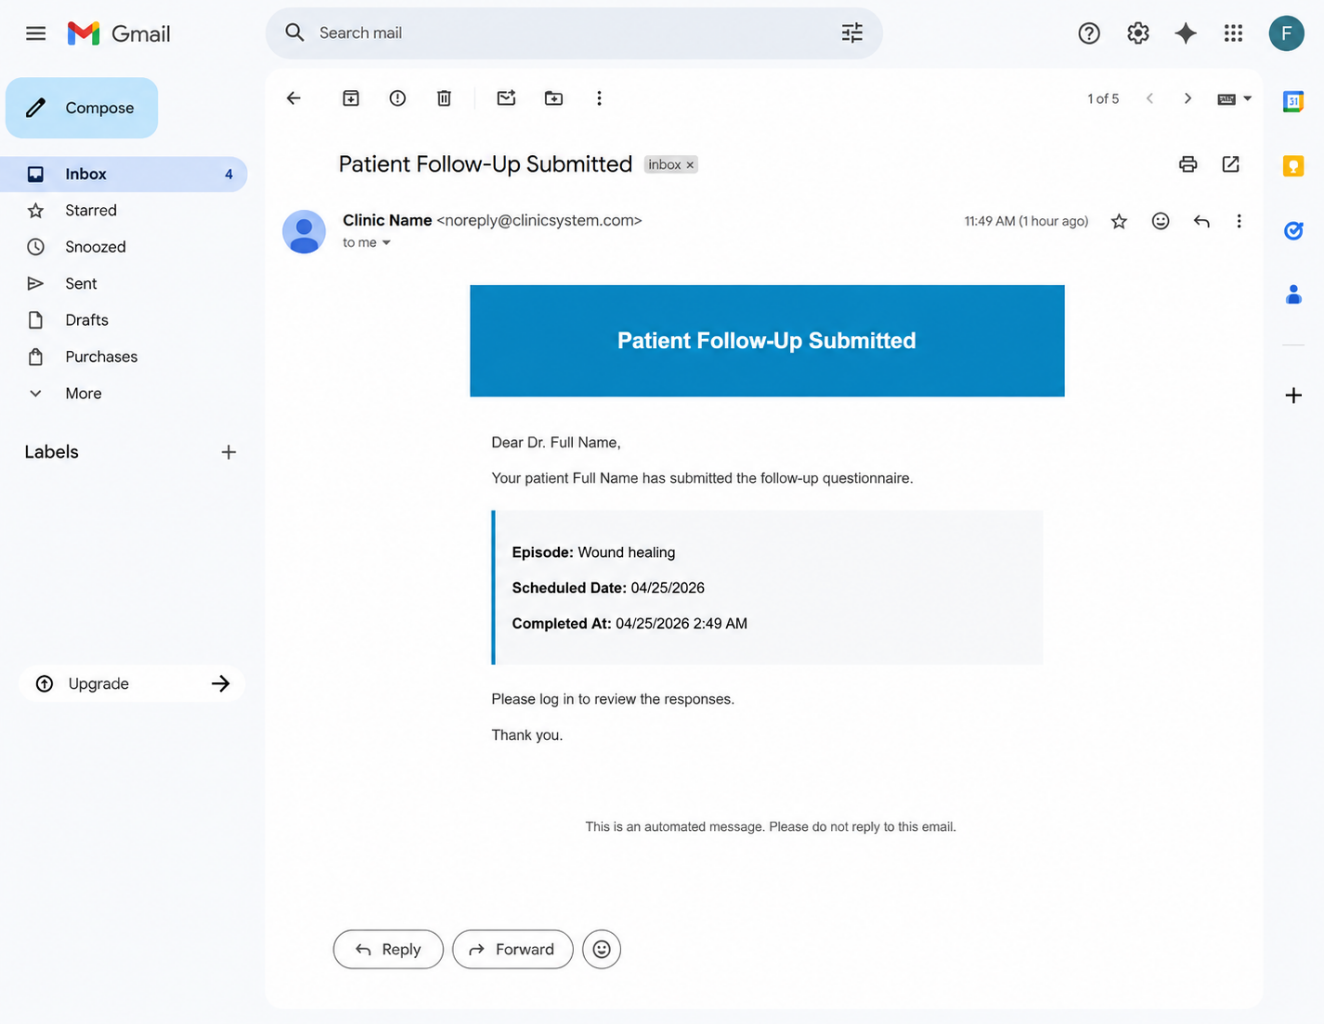
| 4 | System sends Email to patient: "New follow-up scheduled." |
| 5 | System updates the Follow-Up table to show only your manual schedule. |
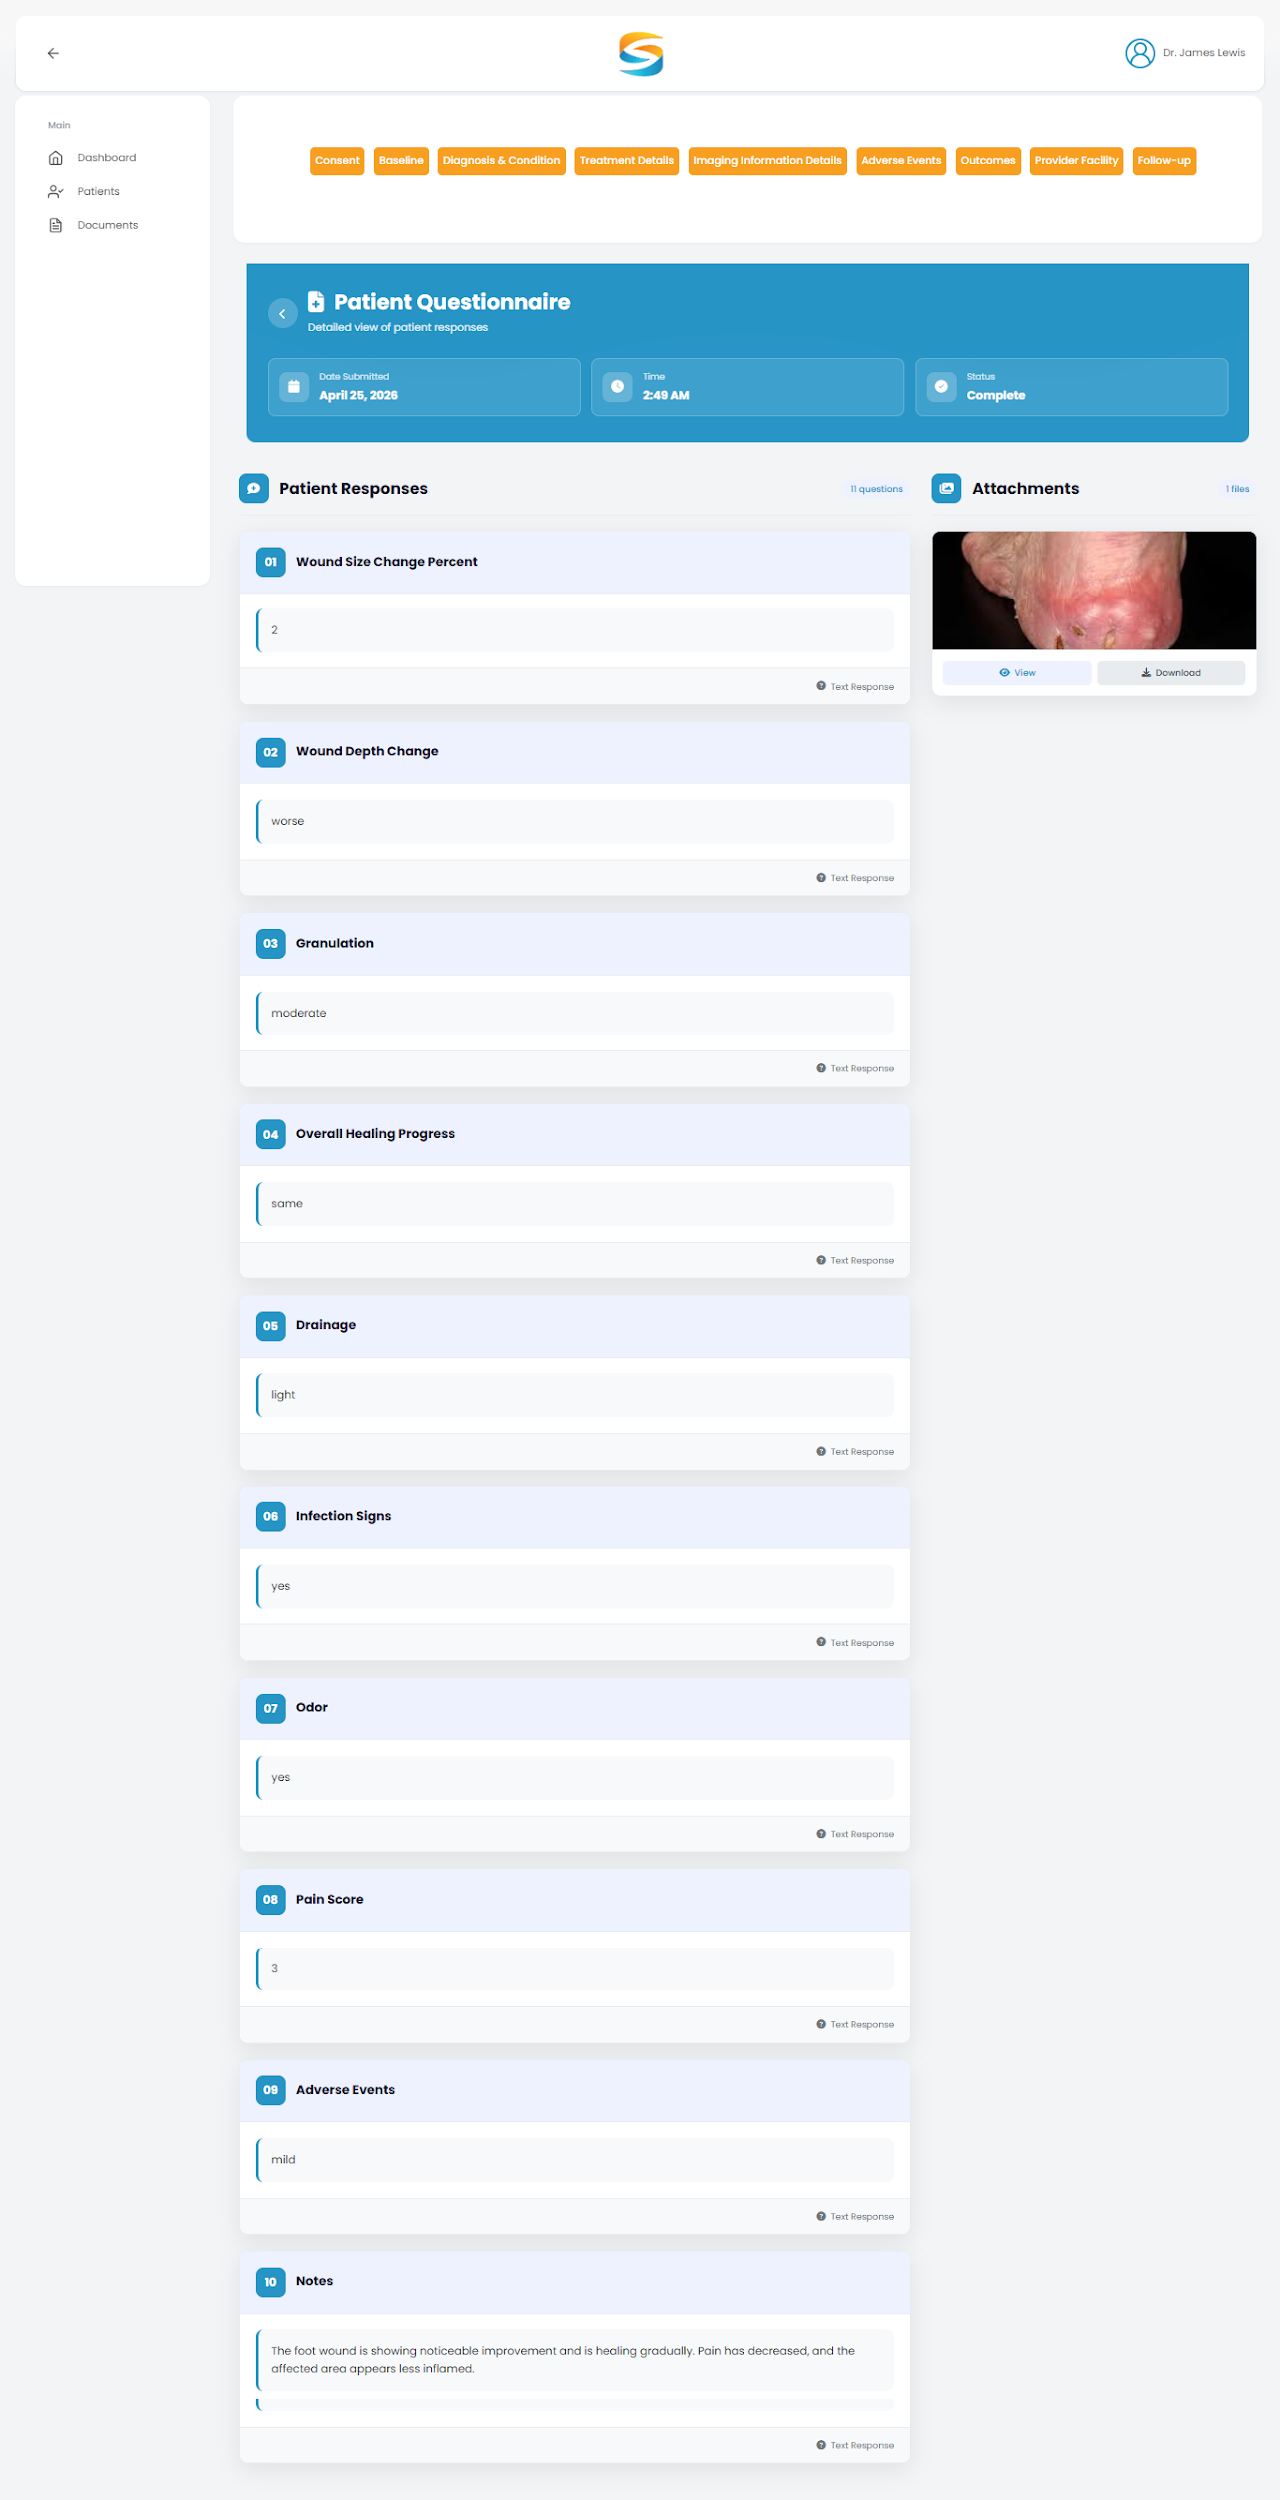
How to View Completed Questionnaires
Steps:
- Find the completed follow-up in the table (STATUS = "Completed")
- Click the View Questionnaire button
- Review all patient responses
Submitted Questionnaire:
How to View and Edit Data Across All Tabs
To view data:
- Click any tab (1-9) to see saved information
To edit data:
- Click the tab you want to edit
- Update the fields
- Click Save at the bottom of the page
Quick Troubleshooting for Case Workflow
| Issue | Solution |
|---|
| Cannot access other tabs | Complete Tab 1 (Consent) first. |
| Cannot view questionnaire | Patient has not completed follow-up yet. |
| Follow-ups not creating | Verify Treatment Start Date is entered in Tab 4 |
| Need to change follow-up date | Go to Tab 9 (Follow-Up) and click Create Schedule. |